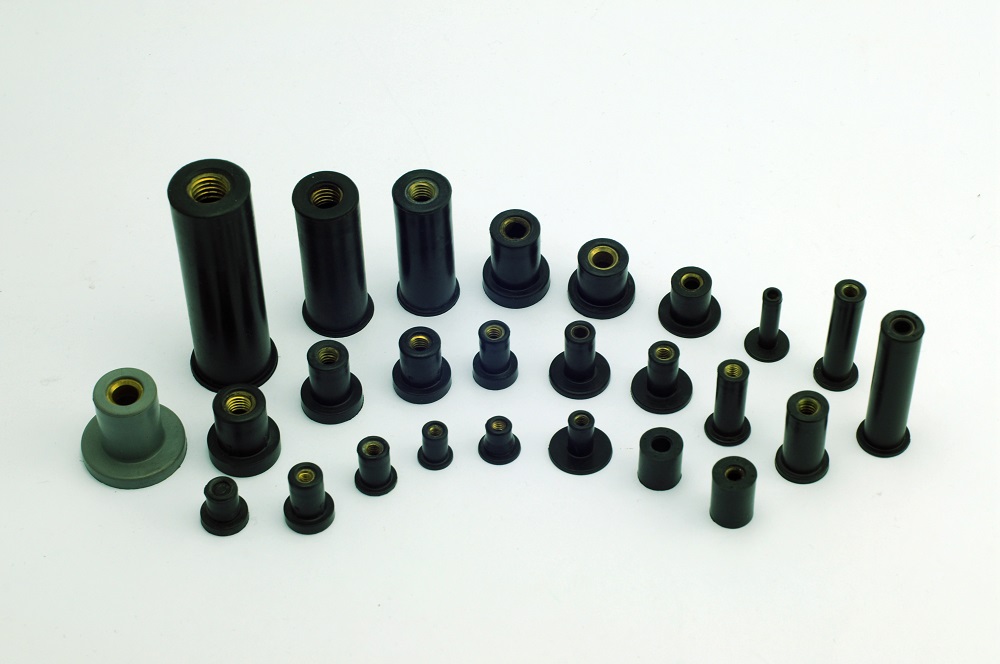
What is a "Rubber Nut-Insert"?
Rubber Nut-Insert is a flanged neoprene or E.P.D.M. rubber bushing with a captive brass or SS nut permanently bonded within.
What Can "Rubber Nut-Insert Be Used For"?
Throughout the industrial sector, such as automotive manufacturing, textile and consumer goods production, building / construction, and electronics industry, the versatility of Rubber Nut-Insert has made it the ideal choice for a seemingly infinite number of applications. This easily removed fixture boasts impressive shock, vibration and sound insulating properties, as well as a nearly impervious seal to the element, such as moisture, galvanic corrosion and dust.
The "Rubber Nut-Insert" has two applications

THIN SHEET APPLICATION
This type of application is used predominantly to either join sheets of similar / dissimilar materials together or to fasten hardware to the surface of a material.
For example:- Mounting a cargo carrier or accessory/ emergency lighting onto the roof of a vehicle.
- To install a finishing surface onto an existing wall, such as finish paneling over dry wall.
- To anchor shelving brackets onto a thin plate wall.

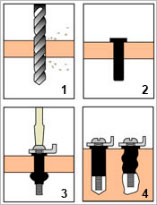
SOLID MATERIAL ANCHOR APPLICATION
Solid materials such as concrete, woods, plastics, steel or rubber can house and solidly retain a Rubber Nut-Insert anchor + application hardware + retaining screw. This usage effectively reduces vibration, movement and noise of mounted machinery or hardware. Ideal for both uniform and non-uniform holes.
For example:- To anchor fans, fridges, air - cons, audio / video equipment to solid floor, wall or ceiling.
- To anchor hardware to a concrete post or wood / steel beam.
- No damage to Rubber Nut-Insert if removed.